
Acumatica Customer FAQ
What is the purpose of marking accounts as Control Accounts?
In Acumatica ERP 2019 R1 and earlier, the system did not restrict posting to general ledger accounts that were used as control accounts in subledgers. This sometimes resulted in situations when the GL balance of an account did not equal the subledger balance of the same account. The two typical reasons for these discrepancies were the following:
- A transaction was entered directly in the general ledger.
- A control account was used as an expense or revenue account in a subledger document.
To prevent these discrepancies, Acumatica ERP 2019 R2 provides the ability to restrict direct posting from the general ledger or from other subledgers to control accounts specified for a subledger.
Once the system is upgraded to a version where control accounts are used (that is 2019R2 and higher) from a version without this feature (that is 2019R1 and earlier), a customer needs to decide if this feature will be used.
There is no impact post upgrade, but control accounts are not automatically marked. If one intends to use the feature, they need to identify and set the GL accounts as control accounts manually.
More information about Control Accounts can be found here.
Information about changes implemented into the product regarding Control Accounts can be found in the Initial Release Notes for 2019R2.
How to update multiple Email address for Purchase Orders ( Contacts )
Below are instructions for updating contacts on vendors to allow for POs to be send to multiple contacts.
- Select Finance, Accounts Payable, Vendors.
- Select the Vendor, Select the Contacts tab, Select Add Contact.
- The contacts screen will load automatically.
- Enter the Last Name and Email.
- Press Save.
- Close the contacts screen, and the Vendor Screen will be visible.
- Select Mailing Settings, Select the form you want to add the contact to.
- Press the + button under receipients.
- Select Contact for the Contact Type, And choose the respective contact ID you created earlier.


How to Make Vendor Pricing Effective
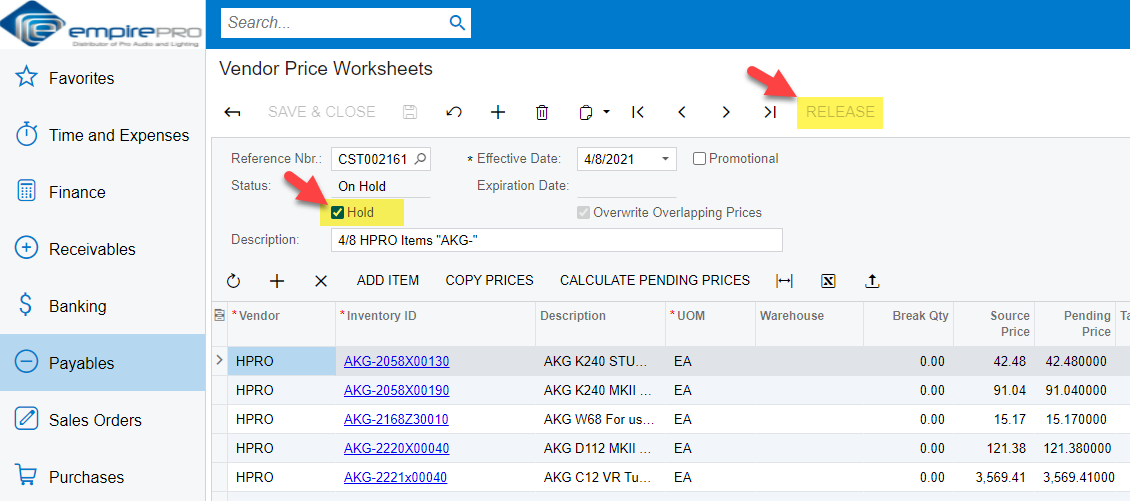
After uploading Vendor Work Sheets, In order to make them effective, you must RELEASE each of the Price Worksheets as shown below.
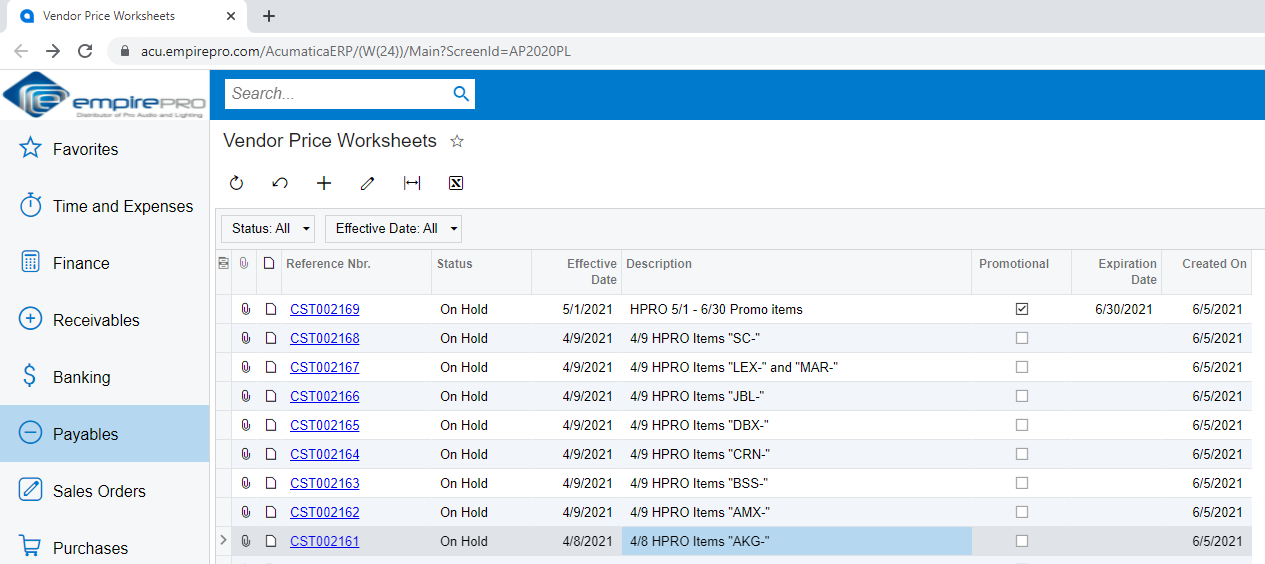
Step 1: Open up the Vendor Price Worksheet one at a time – starting with CST002161.
Step 2: Review for accuracy by comparing to the existing Vendor Prices for the old vendor – i.e., AKG. (note: they should be exact since I copied them from existing price worksheets using the COPY PRICES function).
Step 3: Clear the Hold checkbox, and Release.
Step 3: Verify accuracy on your next Purchase Order.
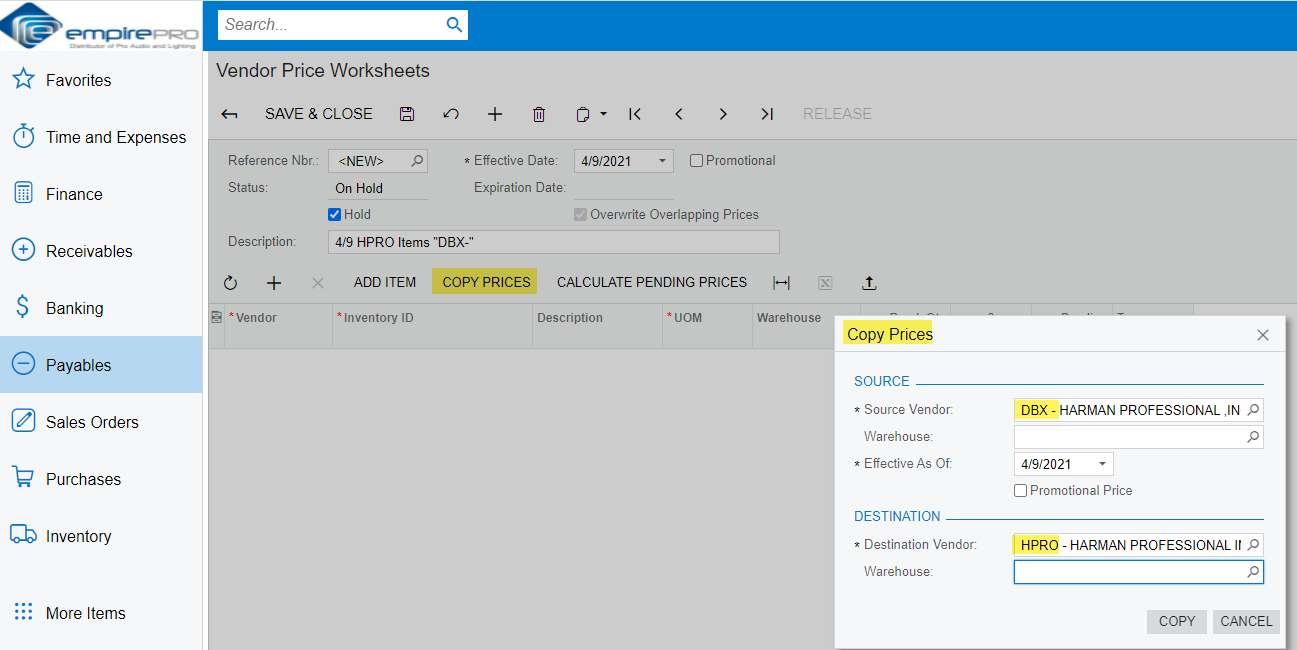
Note: for future reference, use the Copy Prices function below.
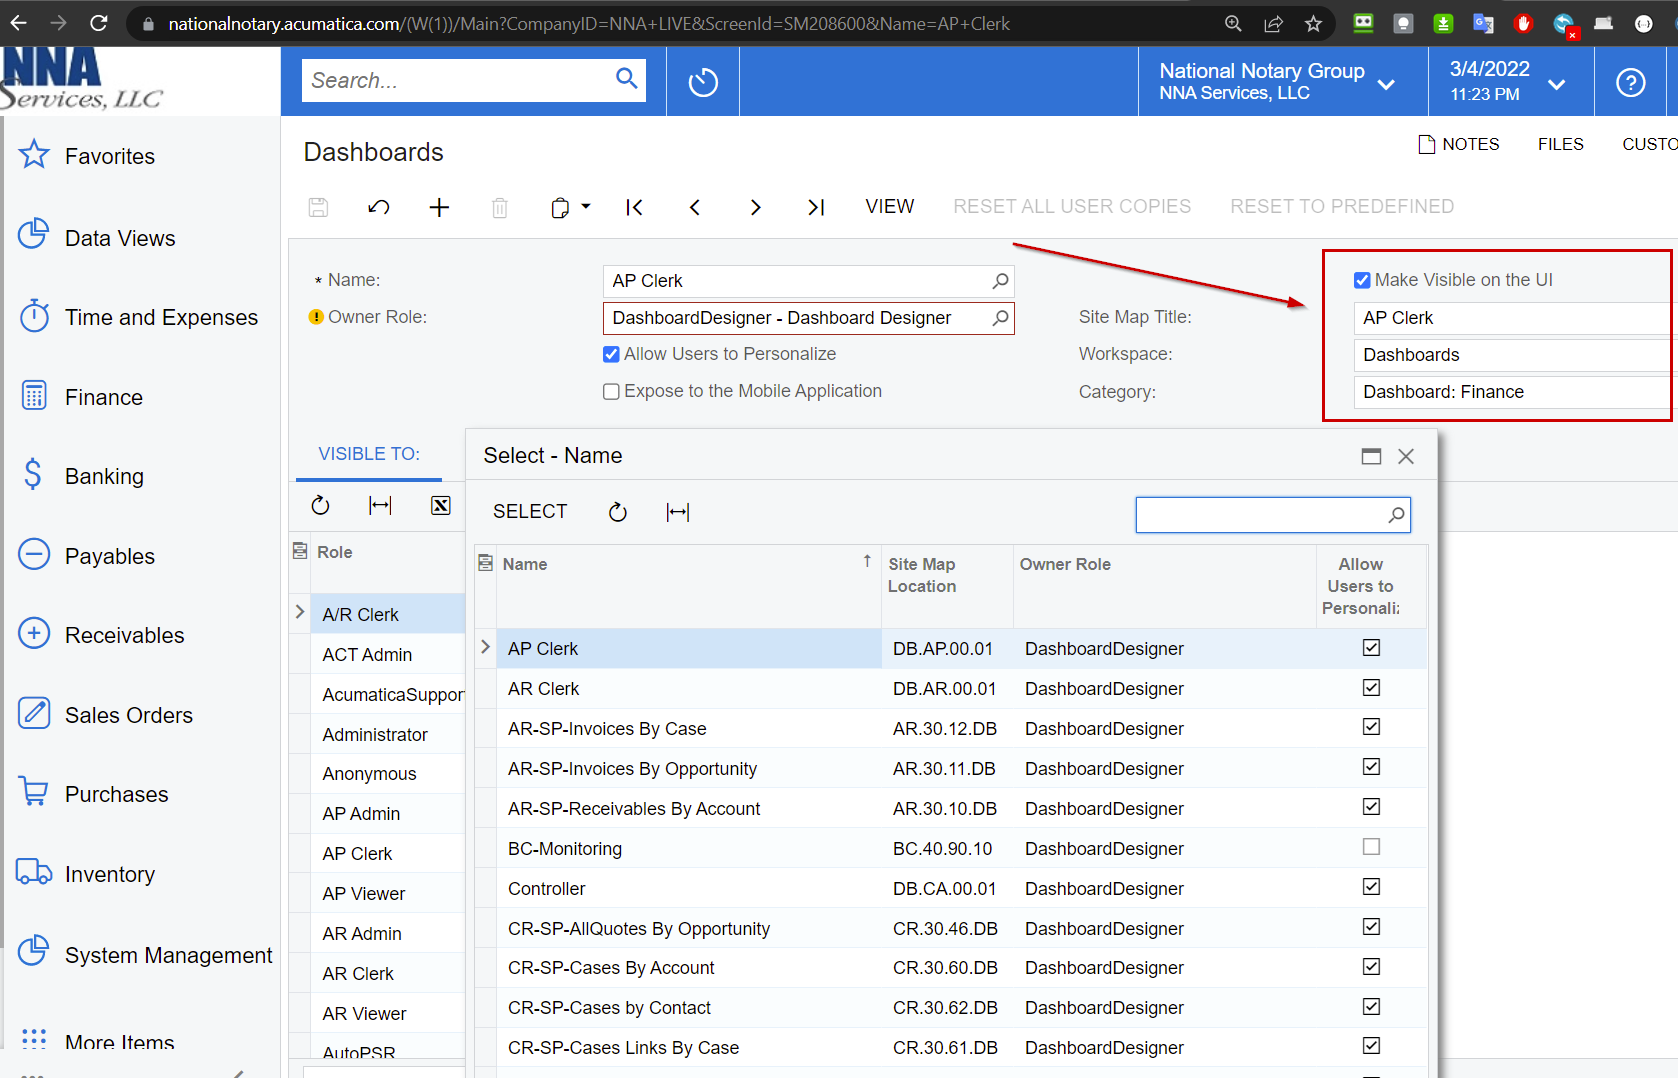
How do I gain access to ALL the pre-defined Dashboards?
When I login and click on the Dashboards icon on the far left Bar, I only see the 3 below.
How do I gain access to ALL the pre-defined Dashboards? From the training materials, there appears to be about 20 of them, specifically I am interested in the Customer View Dashboard.
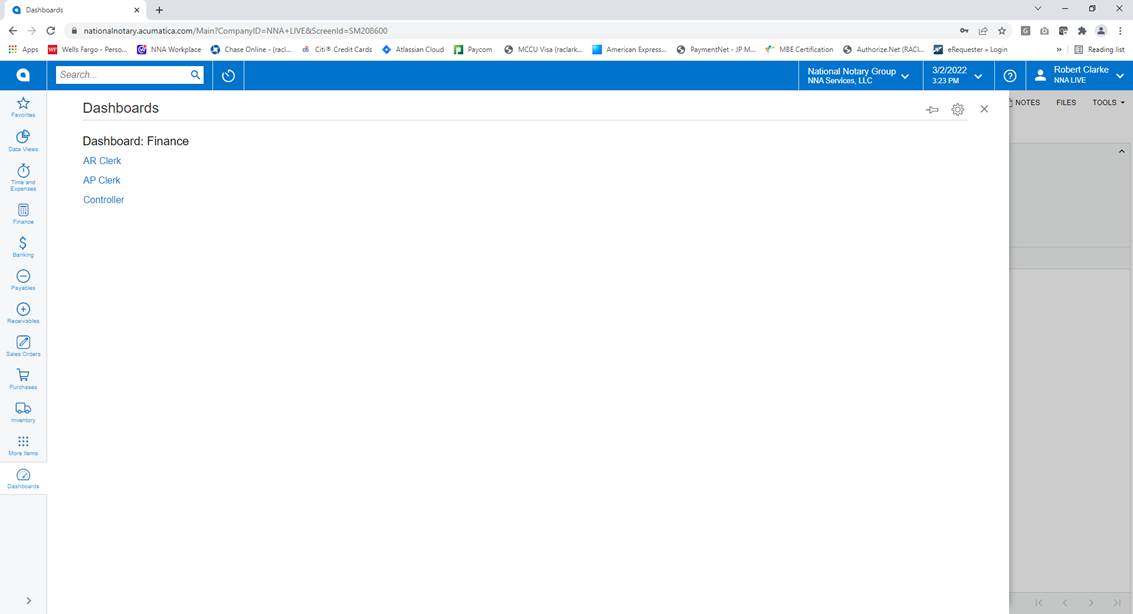
The Dashboards screen is where you manage Dashboards. The site map has a dashboard section but only a few are set to appear there. However, over 20 out-of-the-box dashboards are available and the sitemap settings controls where these dashboards may be made visible.
Troubleshooting
- Financials FAQ: control accounts
- How to correct average cost
- How to add a custom wiki article link to the form-specific Help menu
- How to resolve the ‘Error: ‘Account’ cannot be empty’ error on sales orders or shipments invoicing
- How to process a debit adjustment in Reserved status
- How to enter a return receipt on a corporate credit card
- How to resolve the issue when AR payment was voided in the incorrect period
- How to display a column for December on the Profit & Loss Rolling 12 Month report
Get Started With Acumatica
Don't wait any longer. Visit the links below to learn more about how Acumatica can help your business, schedule a free consultation, or give us a call at (858) 755-9200.
Why Acumatica?
Learn why Acumatica is the fastest growing cloud ERP
Case Studies & Testimonials
Learn how Acumatica has helped our clients grow
Free Consultation
Let's discuss how Acumatica can help your company